Back in Part 1, I described some of the issues with braking on my 1987 Grand National. In this installment, I’m going to explain what I went through to convert my car to a manual brake setup.
The first thing I did was call Wilwood, who manufactured the front brake kit I already had on my vehicle. My kit is a now-obsoleted 10.75″ disc brake kit with Dynalite four piston calipers. While the rotor diameter is only slightly larger than stock, the rotor is much thicker and mated to an aluminum hub. The setup fits behind the stock 15″ wheels.
Wilwood took the information on the brake system, and recommended a 15/16″ master cylinder. The master cylinder size is based on the total piston diameter of the axle with the largest pistons. The weight of the vehicle has no bearing on master cylinder selection. I see that taken into consideration in internet discussions about master cylinders, so I’m putting it out there: it doesn’t matter. You need to know the piston area.
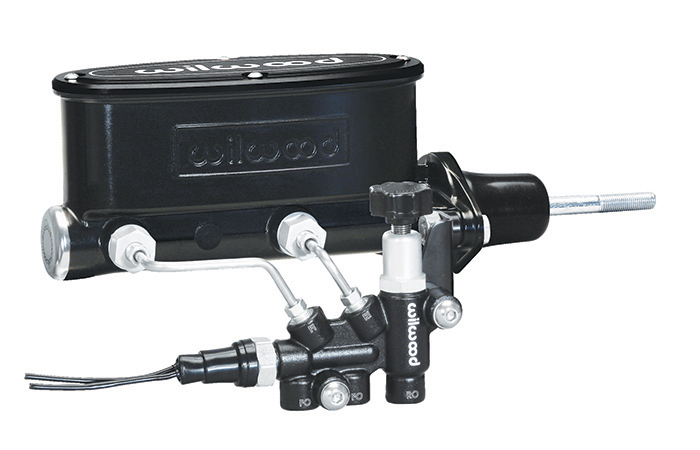
Knowing the proper master cylinder size, I hit Summit Racing and ordered a Wilwood master cylinder kit. It included a master cylinder and an adjustable proportioning valve. I also grabbed a 10psi residual pressure valve to go into the rear line.

Once I got it in hand, removed the existing components. This pile weighed 16.4 pounds. The replacement parts weigh just four pounds.
Now for the kicker: the Wilwood master, and just about any other will not bolt to the firewall. You need an adapter bracket. In my case, I was fortunate enough to still have my old PowerMaster. The PowerMaster used a 7:1 pedal ratio, so the bracket for it aimed the rod at the pedal at the proper angle for a manual pedal (6:1). I removed the bracket, cleaned it up, painted it, and sat it on the heater to cure the paint a bit faster.

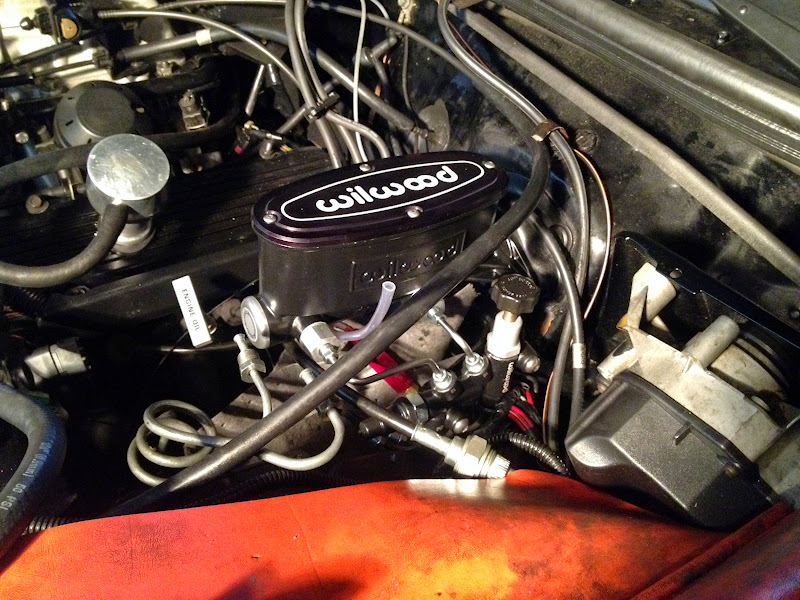
Once the paint was dry, I bench bled the master and bolted it into the car.
Now came the hard part. Lines. This was a mess. The factory lines don’t have the proper ends to screw into the proportioning valve. They also connect to a combination proportioning/residual pressure valve/distribution block on the driver side frame rail. This block also serves as a mounting point for a bracket that’s involved in the transmission shifter linkage. This valve has to come out, or it will negate the fancy proportioning valve I just bought.

Making things worse, the line coming out of this valve going to the rear brakes was a 1/4″ line, which all the other lines are 3/16″. The fitting on the rear line is also goofy metric fitting that you can’t get a union for. I had to cut the flare off the rear line, remove the line nut, and splice in a pre-flared section using a compression fitting.
Also, if you are running drum brakes in the rear, you must install a 10psi residual pressure valve inline between the rear drums and the proportioning valve. This residual pressure valve will keep the rear wheel cylinders pressurized at 10psi all the time. This will act against the return spring in the drum assembly and keep the shoes pressed against the drum. Without it, the shoes will pull off the drum, and you’ll waste your first pedal press pushing the shoes back against the drums, possibly crashing into somebody in the process.
Once other thing I learned: Harbor Freight’s tube flaring kit sucks. Don’t use it. Just get the pre-flared lines from the parts store and bend them to length. If you have to cut one, use a compression union to put it back together.
For the front brakes, you need two 3/16″ lines with 3/8″-24 tube nuts. I got two 30″ length sections, and two unions. Carefully bent
up, they easily screwed into the bottom of the proportioning valve, and the unions allowed them to easily mate with the factory lines going to the front calipers.

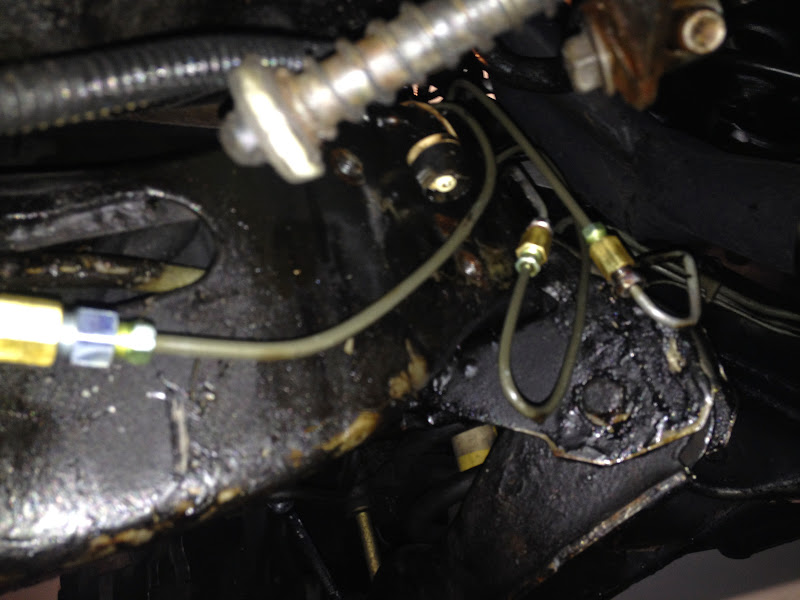
- Detail showing connections to the rear line: the compression union, 3/8″ inverted flare union, then the 3/8″ to 3/16″ adapter, then the 3/8″ nut on the 3/16″ tube going up to the residual valve.
After the lines were all hooked up, I used 1.5″ steel tubular spacers to replace the transmission linkage bracket that had been bolted to the old proportioning valve.
The next step was connecting to the pedal. The Wilwood master has a rod coming out of it that’s threaded for a 3/8″-24 rod end to use as a clevis. The brake pedal I swapped in when I converted to vacuum brakes also had a hole in it already in the exact spot needed. Sadly, I couldn’t find a rod end that would work, so I made my own Clevis out of a piece of bar stock and a steel tube. It’s ugly, but it works. Alternatively, it might be possible to remove the pushrod in the master and replace it with the pushrod from the master or booster you already have. I didn’t want to take apart my shiny new parts.
After all that, the brakes still sucked. I suspected air was trapped in the system somewhere and it needed to be power-bled, so I dropped the car off with my good friends at Grossman Tuning. Not only did they power bleed it, they re-adjusted the rear drums and dialed in the prop valve for me.That’s all! The brakes take a lot of effort, but they work great, and they work the same way every time, boost or not.
Parts List:
- Wilwood 15/16″ master cylinder and prop valve kit, PN 261-13626-BK
- 10psi Residual pressure valve, 260-1876
- 2x 30″ long 3/16″ pre-flared brake line
- 2x 3/8″ inverted flare unions
- 1x 12″ long 1/4″ pre-flared brake line
- 1x 1/4″ tube compression union
- 1x 78/” inverted flare union
- 1x 3/8″ to 3/16″ inverted flare adapter (to adapt rear brake lines to 3/16″ lines coming from master)
- Brake Fluid
- Hardware for making a clevis to mate the pedal to the master cylinder pushrod